Pages

Showing posts with label fabrics. Show all posts

Wednesday, May 27, 2015

Pin Cushion

Hi everyone, Steph Ackerman here today and I've created a pin cushion using some beautiful fabrics from LoveMyFabrics.


Begin by coloring the container with Clearsnap Spritzers in colors to match your fabric.
Place a Styrofoam ball in the container and surround it with batting.


Place the fabric in the container.


It's just that simple - no sewing or gluing is necessary (unless you want to).  Plus, when you tire of the fabric, simply remove it and replace it with new fabric so your pin cushion will always look new and beautiful.

Thanks for stopping by today

Steph


Sunday, May 3, 2015

Dream Catcher

Hi everyone, Steph Ackerman here today and I've got lots of fabric scraps.  Don't you?  What do you do with them?  I'm a hoarder.  I hate to throw anything away so I am always looking for ways to use scraps whether they be fabric or paper!

I came up with a dream catcher that uses strips of fabric of any size and length.  I've simply tied them around an empty ribbon spool.


I tore up my left over fabrics into a variety of widths.  I had a variety of lengths so I left them all different sizes.

 
For the hanger, I tied 3 additional strips to the ribbon spool, gathered them at the top and created a loop.


This is a great way to use scraps.  What will you do with your scraps?

Thanks for stopping by today.

Steph

Wednesday, April 15, 2015

Bon "Voyage" Bracelet

Greetings fabric lovers! Scraps, here, with a quick, fun, wearable from the Voyage fabric project pack!


First we're going to grab our materials:

  • Voyage Fabric Pack
  • Scissors (not pictured)
  • Needle & Thread
  • Chopstick
  • Fine-point Tweezers
  • Batting
  • Baker's Twine
  • Tapestry Needle
  • Bracelet Clasp
Then we're going to cut a narrow strip of each fabric, about 1 1/2" wide.

Fold and pin each strip of fabric along the length and stitch the strips into a long tube. Cut the tubes into 1 1/2" segments.

At this point I suggest putting something fun on television and finding a comfy chair: sewing the beads is not difficult, but it does take a little time (about 10 minutes per bead once you get the first few out of the way).

Slip the small tube of fabric over the chopstick (it makes it easier to sew around the circumference of the tube) and sew a small running stitch about a 1/4" from the end of the tube, starting and ending at the seam. Remove the tube from the chopstick and pull the stitches tight to gather that end, wrap your thread around the gathered fabric 2-3 times and make a single stitch through it. Do not cut your thread, yet.

Use the tweezers to turn the tube inside out through the still-open end, then use the chopstick to fully turn out the stitched end. Turn the open end of the fabric inside (about 1/4"), and then stuff the "capsule" with batting. 

To finish the bead, sew a running stitch along the folded, open edge of the tube, pull it tight, and make a few more stitches along the gathered end to secure it. Knot your thread, and bury the tail inside the finished bead.

Repeat as necessary.

Now, for one of my fabrics I decided to cut each tube in half and make smaller, roundish beads.

The process is the same (though only a 1/8" hem along the top and bottom), but I found it useful to use the tip of my finger inside the bead opening as I stitched along the top edge, my fingernail keeping the batting in place in it's very tiny shell.

For the bracelet I used 6 of the capsule beads and 5 of the rounds, laying them out on my bead board to roughly the length of my charm bracelet for reference.

I cut a length of each bakers twine (one blue & white, one yellow & white) a little more than double the length of my finished bracelet, and threaded both onto a tapestry needle. Once the first bead was strung, I left a 3" tail at the beginning end (for attaching the clasp, later), and knotted the threads on either end of the bead.

Even though this sort of bracelet, even if both threads were to break, is unlikely to have its beads go spilling everywhere, knotting between the beads is a nice touch for any bracelet. So thread the next bead, knot closely, and repeat until the end.


To attach the clasp, string the twine through the loop on the clasp, tie a butcher's knot, then thread the twine back through the nearest bead to secure the end. Trim the excess flush from the end of the bead and you're done!

I hope you've enjoyed this project and will give it a try, yourself! If you wanted to skip the clasp, I'd add another bead repeat and string it with elastic cord.

Wishing you creative days!

Monday, March 23, 2015

A-Tisket, A-Tasket, a Reversible Fabric Basket!

Hello again! Scraps, here, with part two of our pretty little Easter decor project using the Botanic Garden fabric project pack!
They say don't put all your eggs in one basket, but this petite pretty is sized just right to fit last week's trio of stuffed eggs.

To get started you'll need:
  • Botanic Garden project pack
  • Medium-weight Interfacing
  • Low-loft Quilt Batting
  • Lace trim (optional)
  • Chalk pencil, pins, scissors, needle & thread
And, of course, the pattern (click the link to download the pattern sheet from my Hightail page).
For each pattern piece you'll cut 2 out of fabric (one inside, one outside), 1 from your interfacing, and 1 from your quilt batting. The quilt batting will be cut to the finished size (not the cut size!) to avoid bulk in the seams. And speaking of quilt batting, I like to buy the ones intended for baby-sized quilts because they are just the right thickness for small projects like this and a manageable size to work with.
Once you have your pieces cut and the sewing lines transferred in place (very useful for the scalloped edge of the basket), we're going to make a couple of fabric sandwiches:
  1. With the outside fabric base (circle) right side down, center your quilt batting and then top with your interfacing and pin securely inside the sewing area. Leave the inside fabric base alone for now.
  2. Pair your inside and outside sides right sides together, then arrange the batting layer inside the sewing lines, and top with the interfacing. 
  3. (Optional) If you're using lace trim along the scalloped edge, sandwich that in between your inside and outside sides, making sure the pretty/finished edge of the trim is pointing into the fabric sandwich and the selvage/straight edge is placed above the uppermost edges of the sewing line.
Sew your first seam along the scalloped top edge of the basket. I find it easier, on projects like this, to lower the feed dogs on my sewing machine, raise the presser foot, and essentially "free motion" stitch like you would with a curvy quilting pattern. If you've never tried this before with your machine, grab some scraps of fabric and give it a whirl to get used to being in total control of where the fabric goes while stitching--it's really fun!
Unpin one end of your side-sandwich and check to make sure everything looks more or less correct before undoing the rest of the pins and trimming the seam allowances. If you used a loose-weave trim (or, like I did, some hand-knit lace), you'll want to seal the cut edges of the trim with Fray Check or something similar to prevent unraveling. Also clip the inside curves to make turning the scallops easier, later.
Peel up the inside fabric from the sandwich and lay your sides out flat, right-sides up. Clip the bottom edges of the inside fabric and the outside/interfacing sandwich to just before the sewing line to make the next step easier.
Starting in the center of your sandwiched fabric side, pin the side to the sandwiched base, easing it around the curve of the base fabric, just the way we did on the eggs last week, leaving enough for seam allowance where the sides opposite of where you started. Do the same with the single layer of inside sides and base, creating a hollow drum of sorts. 
Sew the bases to the sides and trim the seam allowances along the sewn edges.
Sew up the center seam of the sides but leave a gap (preferably on the inside section) for turning. You'll probably have a bit more than the usual 1/2" seam allowance where the sides meet (blame geometry--I rounded up on the side lengths for ease of measurement, better to have too much than not enough when working with circumferences), so just trim your batting so that it doesn't interfere with the sewing.
Turn the basket right-side out, using a chopstick or similar to help push out all the pretty scallops along the top edge. Pressing and top-stitching of the scalloped edge are optional--I opted not to, but you might like the look of it.
Hand stitch the turning gap closed and then secure the inside (aka lining) to the rest of the basket by stitching in the ditch along the seams where the base meets the sides. The more successful you are at hiding your taking stitches, the more use you'll get out of the reversible nature of this basket!
Believe it or not, the basket and last week's eggs only used about half of each fat quarter in the Botanic Garden fabric project pack, which makes me very happy since I like to stretch my supplies as far as I can. This also means I'll have one more project coming up with them next week, just to squeak in more of this perfect-for-Easter fabric before the big day!

Wishing you creative days,

Tuesday, March 10, 2015

Mother's Day Hexi Flower Pillow


I am so excited to share my first post for the Love My Fabrics store using their lovely fabric.  I made this pillow for Mother's Day for my mother.  I had fun making piping which I hadn't done in a really long time.  I used the Louise Garden Quilt Pattern for the pillow and the instructions and template are fabulous.

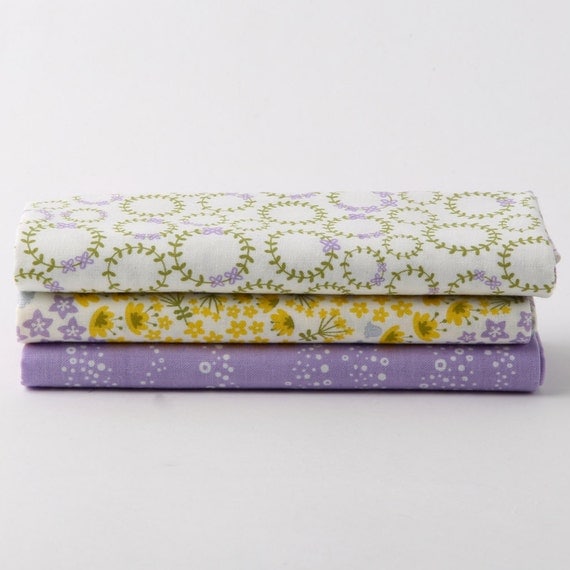
Wildflower Fat Quarter Bundle
Cotton Fabric - Wildflower- Fat quarter bundle


This fat quarter bundle comes pre-designed with hand-selected coordinating fabrics that are very cute and flattering together. Each fabric in the bundle complements the other in a very eye-appealing way. 
Here are some close-ups of my pillow.

I took some photos for you of how I made my piping.  It is a great accent to so many projects.  Here are the steps that I followed:
1.  Determine the width of your bias by taking your cording size and multiplying it by two.  Then multiply the seam allowance .25 by two and add those together.  I had 1/2" cording so I multiplied (2 X .5) + (2 X .5) = 2 inch wide bias strips.
2.  Next to find the length of piping you will need double the pillow's width and length and then add an additional 4 inches.  Mine was 17" square so my formula looked like this (2 X 17) + (2 X 17) +4 =72 inches.  So I needed at least 72 inches of 2" wide bias strips.
3.  Fold the bottom left corner of your fabric up to and matching the top edge.  The fold that this makes is your bias and you are going to want to mark that line with a removable marker.
4.  You will then take your ruler and draw lines on either side of the main line two inches apart until you have enough length for the measurement from above.
5.  Your ends will have an angle to them and you need to trim them up.
6.  You will then need to match up your strips as shown below and draw a line down from the left corner as this will be your stitching line.
Once they are all sewn together you will have one long strip of bias tape that is ready to use however you want.
Hope you have found this helpful and have a great day.  Be sure to click on the link for the store and check out all the wonderful fabric.
Hugs,
Anita


Wednesday, November 26, 2014

Creative Team Designer Announcement - Anita Mulcahey

 Hello Everyone:
I am so happy to be able to introduce myself as a member of the Love My Fabrics Creative Team.  There are some wonderful ladies on this team and you are going to have fun getting to know all of us.  I live in MA with my hubby of almost 30 years and have been sewing since I was four.  I love working with color and can't wait to get started playing with the gorgeous fabrics from Love My Fabrics.  Below are some recent projects that I made for some friends and family members.  Thanks for looking and if you celebrate Thanksgiving, hope it's a wonderful one.


Paper Happy my blog
Hugs,
Anita


Monday, October 13, 2014

Design Team Call for Love My Fabrics

 This call is extended to November 15th  
Welcome to a brand new company looking for our 1st Design Team.
You may of heard of our sister company "Love My Tapes."  Love My Tapes is know for washi, fabric, and lace tapes. 

Love My Fabrics will be known for our unbelievably beautiful fabrics.

In order to get started showing off many of our collections and patterns we would like to have a design team call.  Something that will set our call off from the rest is that we want to start out with 27 Designers.  We are hoping to have a wide variety of sewing, quilting, and paper craft designers join our team.  We are also looking at designers that might be interested in getting our fabrics into their own local Fabric stores.  Designers have an opportunity to earn income by adding new accounts to our list.  So this design team can really pay off.

We are looking for 10 Quilters, 10 for Sewing, and 7 for the Paper Crafts/ Mixed Media team.

Here is just a sample of a couple collections. 

Voyage Collection

Maze Collection
Alley Collection

Daily Christmas Collection

Buddy Collection

Camellia Collection


Here is our Design Team Call.
We are sure there will be more questions, please email any questions to kimberlylovemyfabrics@gmail.com 

Leave us a comment letting us know which of those collection is your favorite. 
Have a great Day!  Sew something special!
I love forward to seeing all the applications coming in!
Kimberly