Pages

Wednesday, April 29, 2015

Up, Up, and Away!

Greetings, fabric lovers! Scraps, here, with another project from the Voyage fat quarter bundle, inspired by the darling little hot air balloons featured on one of the patterns in the pack!
As soon as I saw this set of patterns it immediately said it needed to be in a travel-themed nursery. Of course, you saw how I completely ignored that obvious use in my bracelet project, but you can't fight the status quo all the time, you know? So let's give the fabric what it wants.
I created a simple hot air balloon pattern (which you can download here) and then gathered the rest of my supplies:
  • Voyage fat quarter bundle
  • Light-weight Fusible Interfacing
  • Brown Grosgrain Ribbon (~ 2 yards, but extra is good)
  • Helmar Fabric Glue and a toothpick or skewer
  • Hemp Yarn and a Crochet Hook
  • Low-Loft Quilt Batting 
  • Pen, Scissors, Straight Pins, and a Sewing Machine
  • Fabric Beads
  • Double-Fold Bias Tape 
I cut an 8"x12" piece from the blue & white star print for my background. Then I fused the interfacing to pieces of the two remaining prints before transferring the balloon wedge patterns to them and cutting them out. The interfacing helps stabilize the edges a bit to prevent fraying and, if you wanted to avoid applique work entirely, you could use a double-sided fusible interfacing to adhere the balloon shapes to the background fabric. 
You could grab some brown fabric (burlap would certainly work) for the basket, but I wanted to add a little more texture than that, so I grabbed a foam block and wove my little balloon basket over the pattern, securing the ends with straight pins. A little fabric glue slipped between the outside edge of each overlapping ribbon (the toothpick or skewer makes this easier to do without mess) will keep the woven basket together and then you can snip off the excess ribbon.
Arrange your balloon wedges and basket on the background fabric and stitch into place. I chose to do this applique-style with a small, narrow zigzag stitch (stitch length 1, zigzag width 3, on my machine) and found that if I let the feed dogs do the work of moving the fabric I ended up with far less puckering and shifting as I went along. My balloon ended up slightly skewed from center, but rather than fight with it, I just decided to see it as a balloon drifting in the air.
Just like with the basket, you could use some pre-made cording here and couch it or even glue it, but I chose to use some hemp yarn from my knitting stash and a crochet hook to make 3 chained lengths to strap the balloon "to" the basket (the lengths depend on your placement of the pieces). These I hand-stitched into place, leaving longish tails at each top corner of the baskets, braiding those ends together to make the swag that meets in the middle.
Next, layer the pieced top with the batting and a piece of backing fabric (I used a large scrap from my stash), leaving the ends open. Quilt as desired--I chose to run a line of stitches through the middle of each balloon segment, outline it all, and then add some subtle cloud "puffs" to the background. Then I machine-stitched a narrow band of double-fold bias tape all the way around the front of the work (trimming as necessary), and whip-stitched it in place on the back.
Final touches included adding some of my leftover fabric beads from last week's project as "sandbags" on the balloon, and two loops of bias tape added as hangers and sewn on the back with buttons to hide the stitches on the front.

I'm thrilled with the way this darling little wall hanging turned out! What have you been stitching up, lately?

Wishing you creative days,

Friday, April 24, 2015

Dress Form Door Stop


Hope everyone is humming along with their spring projects, gardening, crafting etc. I know a lot of folks even like to update their wardrobes for spring. Now while I don’t make clothing, I think dress forms are super cool. During spring when the weather is so nice here in Texas, I usually keep the doors open to let the sunshine and warm breezes in. Of course the wind tends to try to close the doors on me.

This little weighted dress form door stop is the perfect solution. It is weighted with rocks inside and stitched up with Love my Fabrics Camellia line. I simply took the shape of a dress form and stitched around it, stuffed and weighted it and closed it up. Then I added a little belt out of the coordinating fabric. I love spring and spring projects and am looking forward to sharing more ideas with you as spring turns into summer.
Happy sewing, Tabatha

Altered Art-Supply Holder


Hi there friends!
Rachelle here today sharing my altered art project that we all need.
It is a Pen/Marker Holder that sits right on your work table.
The holder is super easy and quick to make.
Here are some easy directions.

Things needed:
*Basic Can Good
*Ribbon-5/8 width & 1/4 width
*glue
*Fabric Square
*Cardstock
First thing to do would be to measure the can on the outside and inside.
Next, place the measurements on your fabric and cut out. I love how easy this material cuts without fringes.
Do the same on the cardstock and cut the paper that will be placed inside the can.
 
More Views:


Now apply glue on the cardstock and place inside the can. Then apply glue to the fabric apply it to the outside of the can. Allow the glue to set.


Now apply the ribbon to the inside top of the can followed by placing the ribbon, around the rim and lower edge of the can. Then I apply the smaller ribbon right below the the rim ribbon and the lower edge ribbon.

Finally, give the holder a cute touch by placing a bow in the center of the can. Then I placed a paper daisy in the center of the bow. Allow to dry.
ALL DONE!
Now you have a cute little supply holder for your work table.
It's perfect for markers, pencils, brushes, and scissors!
That was quick, fun, and easy peasy!
Perfect for yourself and as a gift.

That's it for this post.
Thank you for stopping by today and remember to stop by
Love My Fabrics and create your craft project!
Esty Shop Love My Fabrics

See Ya Soon & Huggies!


Monday, April 20, 2015

Easy Fabric Bows

Hi everyone, Steph Ackerman here today and I've been creating bows.

Do you like bows?  Well, I have found an easy way to create perfect bows of all sizes just by using the Bow-Easy and beautiful fabrics from LoveMyFabrics.


I have always had trouble making bows, but I have found the Bow-Easy makes it so easy to create a variety of sized bows.  Just use strips of fabric and even your scraps.


Using the Bow-Easy, you can tear strips of ribbon of any width and create the perfect bow.


You can make an assortment of different sized bows with the Bow-Easy. 
 
 
Just tear your fabric and wrap around the Bow-Easy creating a nice variety that can be used on cards, gifts and anything else you desire.
 
If you have left over fabric, why not consider making bows.
 
Thanks for stopping by today.
 
Steph
 

Wednesday, April 15, 2015

Bon "Voyage" Bracelet

Greetings fabric lovers! Scraps, here, with a quick, fun, wearable from the Voyage fabric project pack!


First we're going to grab our materials:

  • Voyage Fabric Pack
  • Scissors (not pictured)
  • Needle & Thread
  • Chopstick
  • Fine-point Tweezers
  • Batting
  • Baker's Twine
  • Tapestry Needle
  • Bracelet Clasp
Then we're going to cut a narrow strip of each fabric, about 1 1/2" wide.

Fold and pin each strip of fabric along the length and stitch the strips into a long tube. Cut the tubes into 1 1/2" segments.

At this point I suggest putting something fun on television and finding a comfy chair: sewing the beads is not difficult, but it does take a little time (about 10 minutes per bead once you get the first few out of the way).

Slip the small tube of fabric over the chopstick (it makes it easier to sew around the circumference of the tube) and sew a small running stitch about a 1/4" from the end of the tube, starting and ending at the seam. Remove the tube from the chopstick and pull the stitches tight to gather that end, wrap your thread around the gathered fabric 2-3 times and make a single stitch through it. Do not cut your thread, yet.

Use the tweezers to turn the tube inside out through the still-open end, then use the chopstick to fully turn out the stitched end. Turn the open end of the fabric inside (about 1/4"), and then stuff the "capsule" with batting. 

To finish the bead, sew a running stitch along the folded, open edge of the tube, pull it tight, and make a few more stitches along the gathered end to secure it. Knot your thread, and bury the tail inside the finished bead.

Repeat as necessary.

Now, for one of my fabrics I decided to cut each tube in half and make smaller, roundish beads.

The process is the same (though only a 1/8" hem along the top and bottom), but I found it useful to use the tip of my finger inside the bead opening as I stitched along the top edge, my fingernail keeping the batting in place in it's very tiny shell.

For the bracelet I used 6 of the capsule beads and 5 of the rounds, laying them out on my bead board to roughly the length of my charm bracelet for reference.

I cut a length of each bakers twine (one blue & white, one yellow & white) a little more than double the length of my finished bracelet, and threaded both onto a tapestry needle. Once the first bead was strung, I left a 3" tail at the beginning end (for attaching the clasp, later), and knotted the threads on either end of the bead.

Even though this sort of bracelet, even if both threads were to break, is unlikely to have its beads go spilling everywhere, knotting between the beads is a nice touch for any bracelet. So thread the next bead, knot closely, and repeat until the end.


To attach the clasp, string the twine through the loop on the clasp, tie a butcher's knot, then thread the twine back through the nearest bead to secure the end. Trim the excess flush from the end of the bead and you're done!

I hope you've enjoyed this project and will give it a try, yourself! If you wanted to skip the clasp, I'd add another bead repeat and string it with elastic cord.

Wishing you creative days!

Saturday, April 11, 2015

Nautical Shaker Box


Hi friends!
Rachelle here and am so delighted to share 
my Shaker Box design made with

 Take a look!

"Life is Good"

I started by using a 5x7 canvas then measured it 
on top of the fabric cut and it out a square.
The fabric cuts so easily without stray threads.
Next, I applied the fabric like gift wrapping to the canvas 
using my tacky glue.
{Be sure to apply the fabric to the front with the edges glued around the square opening in the back.}

More views:


 Next, its time apply the acetate clear cover. First, I placed
sand, sea shells, pebbles, and sticks inside the square opening.
Now it's time to apply the acetate window on top of the square
using tacky glue. Allow to dry followed by applying burlap twine and white twine around the square.


The twine helps to secure the acetate down. Now it's time
to apply the cute nautical embellishments around the edges.


I already had a little nautical set so I used it along with
adhesive greenery. The lighthouse and achor look great.
 
 
There you have a finished shaker box!
I trust you have enjoyed this project. The perfect wall hanger!
 
That's it for this post.
Thank you for stopping by today and remember to stop by
Love My Fabrics.
Esty Shop Love My Fabrics

See Ya Soon & Huggies!


Thursday, April 9, 2015

Here Fishy Fishy Quilt

Tabatha, here with April’s project “Here Fishy Fishy”.


I’ve been working with our local chapter of Project Linus making kid’s quilts since January of this year. One of my new year’s resolutions is to do more charity sewing. Children, both boys and girls love handmade quilts!

However, since I raised 2 daughters, I find myself gravitating towards pinks, purples and other “brights” as opposed to blues or more boyish toned colors and themes. So when it came time to pick fabrics, I had asked for some collections from Love My Fabrics that had blues as I wanted to make a “boy” themed quilt to donate to my Project Linus group, I am branching out here : )

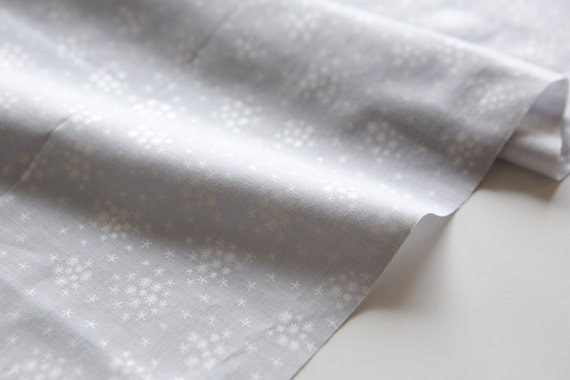
I used the Snorkeling and Camping fabric lines for this quilt. It required 6 fat quarters. You can find the FREE tutorial and pattern here Fat Quarter Baby Quilt.  The two lines of fabrics coordinated really well for this project, blending seamlessly. I admit, I really swooned over that shimmery, silver, star print!


I was overjoyed with how well this quilt turned out. It was easy and quick to make. The original pattern finishes at 34” by 42” which is a good size for a baby quilt. However, I needed to add an outside border in order to make it large enough to donate to Project Linus.  So, as you are reading this post today, I am sewing along with the ladies in Fort Worth making quilts for the kids. Hopefully you will be inspired to go get yourself some of this gorgeous fabric and whip up a quilt or two, maybe even one for your favorite charity.  Happy Quilting!

Wednesday, April 8, 2015

Walk through the Forest Bear Bag

Hey guys, Katie here! Today I wanted to share this "Bear Bag" that I made using the Walk through the Forest collection. I *love* this bear fabric. I think it's just so very adorable.
I'm making a trip to Colorado soon, and I love using little bags like this to hold things (phone, kindle, etc) when I travel. I thought the bear theme would be perfect for Colorado.


I wanted to add a pop of contrasting color, so I used a mint colored zipper and I also added some lace tape by Love My Tapes along the top edge of the bag.


Tuesday, April 7, 2015

Red Ribbon Wreath

I Love Fabric, however I am not a big fan of using my sewing machine.  I had this wonderful bright Red Ribbon Collection from Love My Fabrics so I had to find a fun easy project.  

I have been making the knot ribbon wreaths for a while now so I wanted to try a new wreath.  This time I decided to make bows instead.  Perfect DIY summer craft project that does not involve any sewing!  That's my kind of craft project.

I used  Love My Fabrics   Red Ribbon Collection.   as my main source for the wreath and then a burlap ribbon to break up some of the red.  I love how it turned out. 

Red Ribbon Collection from Love My Fabrics

I have made many ribbon knot wreaths but this time I wanted to create a wreath with all bows.  It's hard to see it from the pictures.. but every piece of fabric is tied in a bow.

Supplies used for Wreath. 
Start by cutting slits in fabric then rip apart. 


Tie Bows with your fabric strips and burlap ribbon
in any order you want. 
You can use the full collection of ribbon
for a more full wreath or keep some scraps for
another DIY project. 

Finished Wreath.  Hanging on my wall in the center of a huge black frame.  After I teach
this class I am sending it to the owner of  Love My Fabrics. 
For more fabric collections please check out this ETSY shop of Love My Fabrics.  You only need one collection to create this wreath and a roll of burlap ribbon.  You can easily create a few as hostess gifts, teacher gifts, or one for your front door~
Hope you like my wreath!